


DeFi is now a serious matter of debate within the cryptocurrency area. DeFi stands for “Decentralized finance,” which implies that there’s no central authority keeping track of and controlling the switch of funds. This additionally implies that transactions in DeFi are P2P (peer to look), which implies that no central authority is accountable for transferral, and funds are despatched instantly from one entity to a different.
On this article we are going to learn to get began with DeFi by making a full-stack DeFi app on the Polygon chain utilizing Subsequent.js because the frontend. This app will promote and buy OKToken (a fictional token) from the consumer. Nevertheless, each buy transaction reduces one token from the quantity of tokens you may get per MATIC (promoting will increase this quantity by one). This isn’t a perfect demonstration, however this fashion you may perceive find out how to use your individual logic in Solidity sensible contracts and study to create your individual full-stack DeFi app utilizing Polygon.
Contents
Necessities
To get began with this tutorial, be sure to have the next:
Now that you’ve checked the necessities, let’s proceed with creating our Hardhat mission to work with our Solidity sensible contracts.
Making a Hardhat mission
Navigate to a protected listing and run the next command within the terminal to initialize your Hardhat mission:
npx hardhat
When you run the command, you must see the next Hardhat initialization wizard in your terminal.
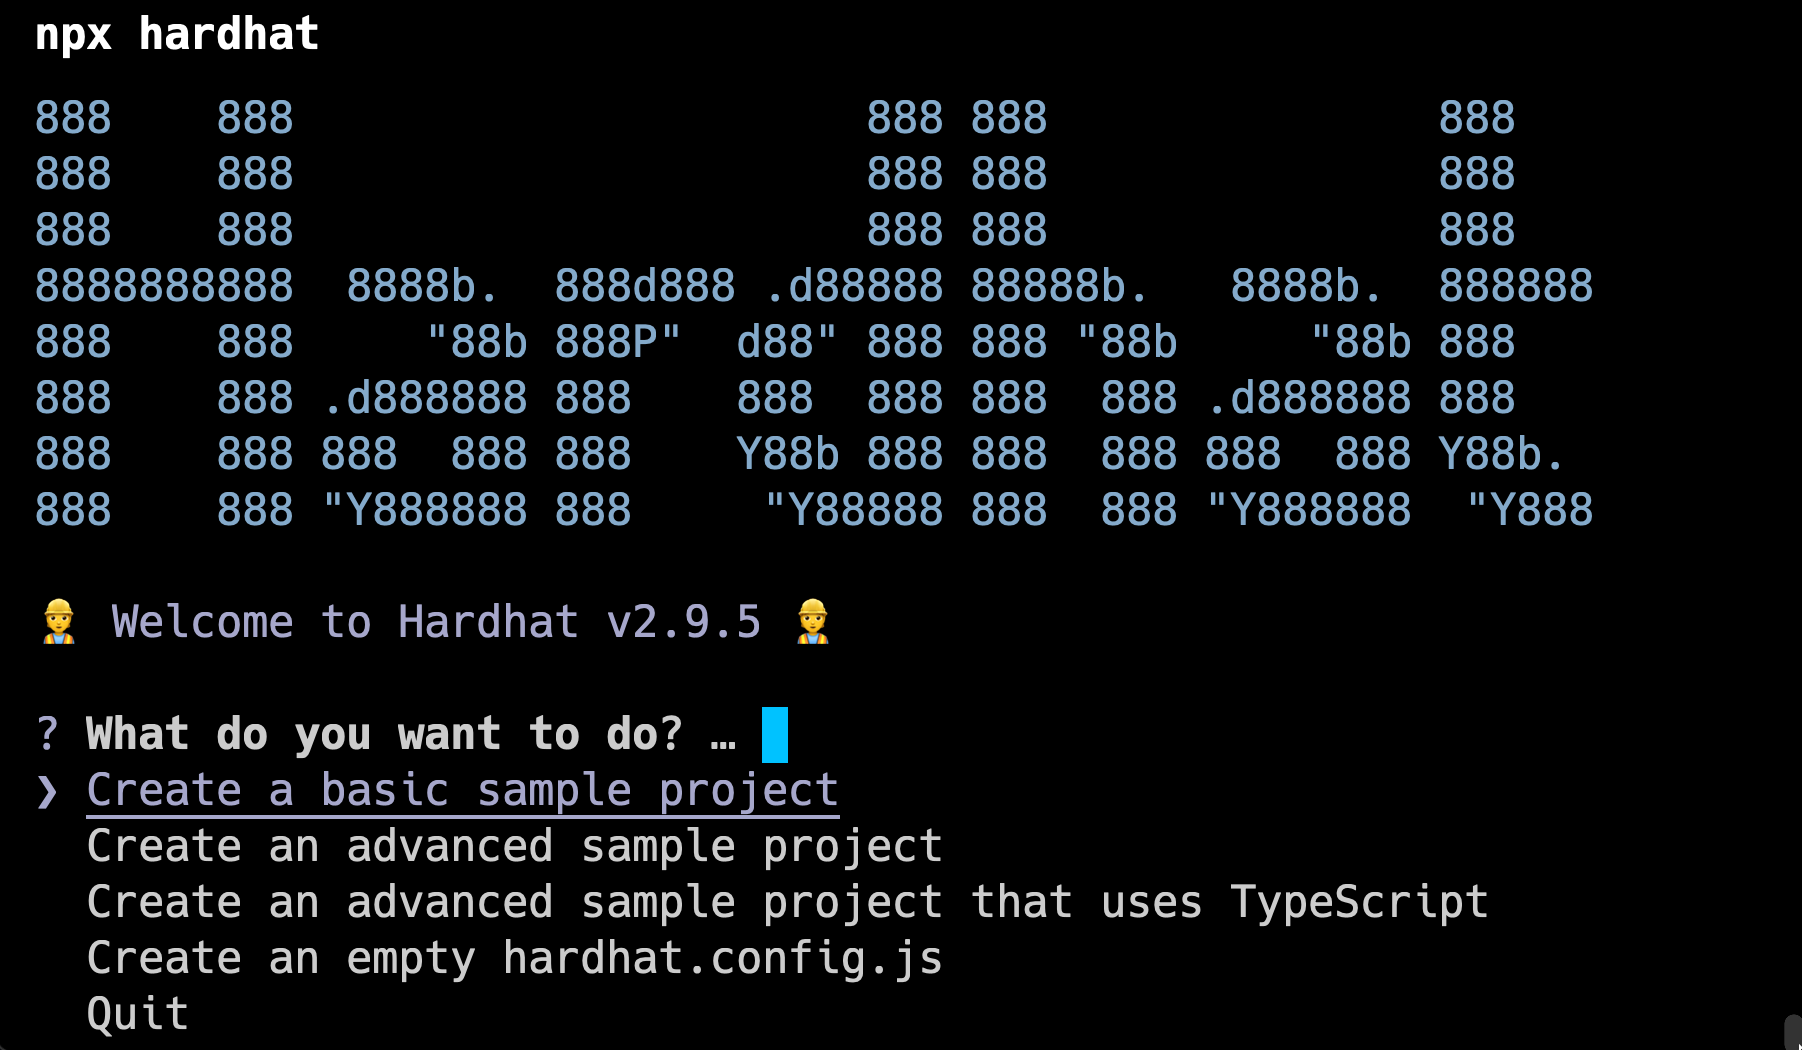
From the checklist, select Create a sophisticated pattern mission. Then you may be requested the place you wish to initialize the Hardhat mission; don’t change the sphere, simply press Enter in order that the mission will get initialized within the present listing.
Then you may be requested whether or not or not you wish to set up dependencies required to your Hardhat mission to run. Press y as a result of we will likely be needing these dependencies, and putting in them proper now could be the most effective thought.
Set up of dependencies will begin, and would possibly take a number of seconds or minutes relying upon the machine you’re working. Now, run the next command within the terminal to put in one other dependency we might want to ease our Solidity contract improvement:
npm set up @openzeppelin/contracts
OpenZeppelin gives sensible contract requirements that we are able to use in our personal sensible contracts to simply create an Ownable, ERC-20 and ERC-721 contracts, and extra.
As soon as the dependencies are efficiently put in, open the listing in a code editor. I’ll be utilizing VS Code for this tutorial.
We will likely be creating two sensible contracts: the primary one will likely be our ERC-20 token itself and the second will likely be a vendor contract, which is able to facilitate shopping for and promoting of those tokens.
Creating our sensible contracts
Now, go to the contracts folder and create a brand new Solidity file named OKToken.sol, which is able to comprise our ERC-20 token contract.
Use the next code for this file:
// SPDX-License-Identifier: Unlicense
pragma solidity ^0.8.4;
import "@openzeppelin/contracts/token/ERC20/ERC20.sol";

contract OKToken is ERC20 {
    constructor() ERC20("OKT", "OKToken"){
        _mint(msg.sender, 10000 * 10 ** 18);
    }
}
Within the above code, we’re importing the ERC20.sol file from @openzeppelin/contracts which is able to assist us get began with an ERC-20 token simply. Then, within the constructor, we’re offering the image "OKT" and title "OKToken" for our token.
That’s all for the token contract! Now, let’s work on the seller contract. Below the contracts folder, create a brand new file named OKVendor.sol with the next code:
// SPDX-License-Identifier: MIT
pragma solidity ^0.8.4;
import "./OKToken.sol";
import "@openzeppelin/contracts/entry/Ownable.sol";

contract OKVendor is Ownable {
  OKToken yourToken;
  uint256 public tokensPerNativeCurrency = 100;
  occasion BuyTokens(tackle purchaser, uint256 amountOfNativeCurrency, uint256 amountOfTokens);
  constructor(tackle tokenAddress) {
    yourToken = OKToken(tokenAddress);
  }

  perform buyTokens() public payable returns (uint256 tokenAmount) {
    require(msg.worth > 0, "It's good to ship some NativeCurrency to proceed");
    uint256 amountToBuy = msg.worth * tokensPerNativeCurrency;

    uint256 vendorBalance = yourToken.balanceOf(tackle(this));
    require(vendorBalance >= amountToBuy, "Vendor contract has not sufficient tokens to carry out transaction");

    (bool despatched) = yourToken.switch(msg.sender, amountToBuy);
    require(despatched, "Didn't switch token to consumer");
    tokensPerNativeCurrency = tokensPerNativeCurrency - 1;

    emit BuyTokens(msg.sender, msg.worth, amountToBuy);
    return amountToBuy;
  }
  perform sellTokens(uint256 tokenAmountToSell) public {

    require(tokenAmountToSell > 0, "Specify an quantity of token higher than zero");

    uint256 userBalance = yourToken.balanceOf(msg.sender);
    require(userBalance >= tokenAmountToSell, "You might have inadequate tokens");

    uint256 amountOfNativeCurrencyToTransfer = tokenAmountToSell / tokensPerNativeCurrency;
    uint256 ownerNativeCurrencyBalance = tackle(this).steadiness;
    require(ownerNativeCurrencyBalance >= amountOfNativeCurrencyToTransfer, "Vendor has inadequate funds");
    (bool despatched) = yourToken.transferFrom(msg.sender, tackle(this), tokenAmountToSell);
    require(despatched, "Didn't switch tokens from consumer to vendor");

    (despatched,) = msg.sender.name{worth: amountOfNativeCurrencyToTransfer}("");
    tokensPerNativeCurrency = tokensPerNativeCurrency + 1;
    require(despatched, "Didn't ship NativeCurrency to the consumer");
  }
  perform getNumberOfTokensInNativeCurrency() public view returns(uint256) {
    return tokensPerNativeCurrency;
  }

  perform withdraw() public onlyOwner {
    uint256 ownerBalance = tackle(this).steadiness;
    require(ownerBalance > 0, "No NativeCurrency current in Vendor");
    (bool despatched,) = msg.sender.name{worth: tackle(this).steadiness}("");
    require(despatched, "Didn't withdraw");
  }
}
This may assist us facilitate the shopping for and promoting of tokens.
Within the above contract, first we’re importing our token contract, which we’d like with the intention to work together with our token contract utilizing the seller contract and name capabilities.
We’re additionally importing Ownable.sol from @openzeppelin/contracts. Which means that the proprietor of the sensible contract can switch its possession and have entry to owners-only capabilities.
After initializing the sensible contract, we outline the variable tokensPerNativeCurrency which states the variety of tokens which might be bought utilizing 1 MATIC. We will likely be altering this quantity based mostly on the transactions made.
We then have a constructor which is able to take OKToken’s contract tackle in order that we are able to talk with the deployed contract and carry out capabilities on them.
Within the buyTokens() perform, we’re performing checks to make sure the right quantity of MATIC is shipped to the sensible contract, and that the seller contract has the required quantity of tokens. Then we name the perform switch() from the OKToken occasion we beforehand created to switch the tokens to the request sender.
Within the sellTokens() perform, we’re performing checks to make sure that the request sender has sufficient tokens and if the seller contract has sufficient MATIC to ship again to the request sender. Then, we use the transferFrom() perform from the OKToken occasion we beforehand created to switch the tokens from the request sender’s pockets to the sensible contract. Nevertheless, the sender must approve this transaction; we carry out this approval on the shopper aspect earlier than making the request. We are going to cowl this half after we make the entrance finish of this software.
Lastly, we’ve got the withdraw() perform, which is just accessible by the proprietor of the contracts. It permits them to withdraw all of the MATIC current on the contract.
Now that we’ve got the sensible contracts prepared, let’s deploy them to Polygon Mumbai testnet!
Deploying our sensible contracts
We will likely be making a script to deploy our contract to Polygon Mumbai. As soon as the contracts are deployed, we are going to programmatically ship all of the tokens saved on the deployer’s pockets to the seller contract.
First go to hardhat.config.js and underneath module.exports, add the next object in order that Hardhat is aware of which community to connect with:
networks: {
  mumbai: {
    url: "https://matic-mumbai.chainstacklabs.com",
    accounts: ["PRIVATE KEY HERE"],
  }
}
We’re offering the community a reputation (mumbai on this case) and offering an RPC URL. The talked about RPC URL is for Polygon Mumbai. If you wish to use Polygon Mainnet you may select your RPC URL. Keep in mind to enter your individual pockets personal key with some check MATIC to pay for gasoline charges concerned within the sensible contract deployment course of.
Now, underneath the scripts folder, create a brand new file known as deploy.js. Paste within the following:
const { BigNumber, utils } = require("ethers");
const hardhat = require("hardhat");
async perform predominant() {
  const OKToken = await hardhat.ethers.getContractFactory("OKToken");
  const oktoken = await OKToken.deploy();
  await oktoken.deployed();
  console.log("[📥] OKToken deployed to deal with: " + oktoken.tackle);
  const OKVendor = await hardhat.ethers.getContractFactory("OKVendor");
  const okvendor = await OKVendor.deploy(oktoken.tackle);
  console.log("[📥] OKVendor deployed to deal with: " + okvendor.tackle);
  await oktoken.deployed();
  // Switch oktokens to vendor
  await oktoken.capabilities.switch(okvendor.tackle, utils.parseEther("10000"));
  console.log("[🚀] Tokens transferred to OKVendor");
}
predominant()
  .then(() => course of.exit(0))
  .catch((error) => {
    console.error(error);
    course of.exit(1);
});
Within the above file, we’re instructing Hardhat find out how to deploy our contract. The predominant() perform is the entry level right here. First, we get the OKToken contract and deploy it. Then, we get the OKVendor contract, present OKToken contract tackle within the constructor, and deploy the contract. Then, we switch all of the funds from OKToken contract to OKVendor contract.
Run the next command within the terminal to run the script and deploy our contracts to the Polygon Mumbai community:
npx hardhat run --network mumbai scripts/deploy.js --show-stack-traces
Be aware that the community title should match the one talked about in hardhat.config.js. After working the script, the contracts ought to be deployed and you must see the next in your terminal:

For those who see an output much like this, your sensible contracts have been deployed and configured efficiently. Now, let’s proceed with creating our Subsequent.js software.
Making a Subsequent.js DeFi app
Below the identical listing, run the next command within the terminal to create your Subsequent.js app:
npx create-next-app frontend
The above command will create a brand new app and routinely set up essential dependencies.
Navigate to the frontend folder and use the next command within the terminal to put in further dependencies, which is able to assist us work together with our sensible contracts:
yarn add @thirdweb-dev/react @thirdweb-dev/sdk ethers web3
We’re putting in @thirdweb-dev/react and @thirdweb-dev/sdk in order that we are able to simply authenticate the consumer and join their wallets to our app utilizing MetaMask. ethers is a required dependency for thirdweb so we have to set up that as effectively. Lastly, we’re putting in web3 in order that we are able to work together with our sensible contract.
Including the thirdweb supplier
To get began, we have to wrap our app inside a thirdwebProvider in order that thirdweb can perform correctly.
Go to your _app.js file underneath pages folder and add within the following:
import { thirdwebProvider, ChainId } from "@thirdweb-dev/react";
import "../types/globals.css";
perform MyApp({ Part, pageProps }) {
  return (
    <thirdwebProvider desiredChainId={ChainId.Mumbai}>
      <Part {...pageProps} />
    </thirdwebProvider>
  );
}
export default MyApp;
Within the above code, we’re importing thirdwebProvider and enclosing our app inside it. We’re additionally offering a desiredChainId of the chain ID of Polygon Mumbai. You may as well use the chain ID for Polygon Mainnet if you want to take action.
Create a brand new file in your Subsequent.js app root known as contracts.js and add the next content material:
export const oktoken = {
  contractAddress: "0xE83DD81890C76BB8c4b8Bc6365Ad95E5e71495E5",
  abi: [
    {
      inputs: [],
      stateMutability: "nonpayable",
      sort: "constructor",
    },
    {
      nameless: false,
      inputs: [
        {
          indexed: true,
          internalType: "address",
          name: "owner",
          type: "address",
        },
        {
          indexed: true,
          internalType: "address",
          name: "spender",
          type: "address",
        },
        {
          indexed: false,
          internalType: "uint256",
          name: "value",
          type: "uint256",
        },
      ],
      title: "Approval",
      sort: "occasion",
    },
    {
      nameless: false,
      inputs: [
        {
          indexed: true,
          internalType: "address",
          name: "from",
          type: "address",
        },
        {
          indexed: true,
          internalType: "address",
          name: "to",
          type: "address",
        },
        {
          indexed: false,
          internalType: "uint256",
          name: "value",
          type: "uint256",
        },
      ],
      title: "Switch",
      sort: "occasion",
    },
    {
      inputs: [
        {
          internalType: "address",
          name: "owner",
          type: "address",
        },
        {
          internalType: "address",
          name: "spender",
          type: "address",
        },
      ],
      title: "allowance",
      outputs: [
        {
          internalType: "uint256",
          name: "",
          type: "uint256",
        },
      ],
      stateMutability: "view",
      sort: "perform",
    },
    {
      inputs: [
        {
          internalType: "address",
          name: "spender",
          type: "address",
        },
        {
          internalType: "uint256",
          name: "amount",
          type: "uint256",
        },
      ],
      title: "approve",
      outputs: [
        {
          internalType: "bool",
          name: "",
          type: "bool",
        },
      ],
      stateMutability: "nonpayable",
      sort: "perform",
    },
    {
      inputs: [
        {
          internalType: "address",
          name: "account",
          type: "address",
        },
      ],
      title: "balanceOf",
      outputs: [
        {
          internalType: "uint256",
          name: "",
          type: "uint256",
        },
      ],
      stateMutability: "view",
      sort: "perform",
    },
    {
      inputs: [],
      title: "decimals",
      outputs: [
        {
          internalType: "uint8",
          name: "",
          type: "uint8",
        },
      ],
      stateMutability: "view",
      sort: "perform",
    },
    {
      inputs: [
        {
          internalType: "address",
          name: "spender",
          type: "address",
        },
        {
          internalType: "uint256",
          name: "subtractedValue",
          type: "uint256",
        },
      ],
      title: "decreaseAllowance",
      outputs: [
        {
          internalType: "bool",
          name: "",
          type: "bool",
        },
      ],
      stateMutability: "nonpayable",
      sort: "perform",
    },
    {
      inputs: [
        {
          internalType: "address",
          name: "spender",
          type: "address",
        },
        {
          internalType: "uint256",
          name: "addedValue",
          type: "uint256",
        },
      ],
      title: "increaseAllowance",
      outputs: [
        {
          internalType: "bool",
          name: "",
          type: "bool",
        },
      ],
      stateMutability: "nonpayable",
      sort: "perform",
    },
    {
      inputs: [],
      title: "title",
      outputs: [
        {
          internalType: "string",
          name: "",
          type: "string",
        },
      ],
      stateMutability: "view",
      sort: "perform",
    },
    {
      inputs: [],
      title: "image",
      outputs: [
        {
          internalType: "string",
          name: "",
          type: "string",
        },
      ],
      stateMutability: "view",
      sort: "perform",
    },
    {
      inputs: [],
      title: "totalSupply",
      outputs: [
        {
          internalType: "uint256",
          name: "",
          type: "uint256",
        },
      ],
      stateMutability: "view",
      sort: "perform",
    },
    {
      inputs: [
        {
          internalType: "address",
          name: "to",
          type: "address",
        },
        {
          internalType: "uint256",
          name: "amount",
          type: "uint256",
        },
      ],
      title: "switch",
      outputs: [
        {
          internalType: "bool",
          name: "",
          type: "bool",
        },
      ],
      stateMutability: "nonpayable",
      sort: "perform",
    },
    {
      inputs: [
        {
          internalType: "address",
          name: "from",
          type: "address",
        },
        {
          internalType: "address",
          name: "to",
          type: "address",
        },
        {
          internalType: "uint256",
          name: "amount",
          type: "uint256",
        },
      ],
      title: "transferFrom",
      outputs: [
        {
          internalType: "bool",
          name: "",
          type: "bool",
        },
      ],
      stateMutability: "nonpayable",
      sort: "perform",
    },
  ],
};
export const okvendor = {
  contractAddress: "0xAa3b8cbB24aF3EF68a0B1760704C969E57c53D7A",
  abi: [
    {
      inputs: [
        {
          internalType: "address",
          name: "tokenAddress",
          type: "address",
        },
      ],
      stateMutability: "nonpayable",
      sort: "constructor",
    },
    {
      nameless: false,
      inputs: [
        {
          indexed: false,
          internalType: "address",
          name: "buyer",
          type: "address",
        },
        {
          indexed: false,
          internalType: "uint256",
          name: "amountOfNativeCurrency",
          type: "uint256",
        },
        {
          indexed: false,
          internalType: "uint256",
          name: "amountOfTokens",
          type: "uint256",
        },
      ],
      title: "BuyTokens",
      sort: "occasion",
    },
    {
      nameless: false,
      inputs: [
        {
          indexed: true,
          internalType: "address",
          name: "previousOwner",
          type: "address",
        },
        {
          indexed: true,
          internalType: "address",
          name: "newOwner",
          type: "address",
        },
      ],
      title: "OwnershipTransferred",
      sort: "occasion",
    },
    {
      inputs: [],
      title: "buyTokens",
      outputs: [
        {
          internalType: "uint256",
          name: "tokenAmount",
          type: "uint256",
        },
      ],
      stateMutability: "payable",
      sort: "perform",
    },
    {
      inputs: [],
      title: "getNumberOfTokensInNativeCurrency",
      outputs: [
        {
          internalType: "uint256",
          name: "",
          type: "uint256",
        },
      ],
      stateMutability: "view",
      sort: "perform",
    },
    {
      inputs: [],
      title: "proprietor",
      outputs: [
        {
          internalType: "address",
          name: "",
          type: "address",
        },
      ],
      stateMutability: "view",
      sort: "perform",
    },
    {
      inputs: [],
      title: "renounceOwnership",
      outputs: [],
      stateMutability: "nonpayable",
      sort: "perform",
    },
    {
      inputs: [
        {
          internalType: "uint256",
          name: "tokenAmountToSell",
          type: "uint256",
        },
      ],
      title: "sellTokens",
      outputs: [],
      stateMutability: "nonpayable",
      sort: "perform",
    },
    {
      inputs: [],
      title: "tokensPerNativeCurrency",
      outputs: [
        {
          internalType: "uint256",
          name: "",
          type: "uint256",
        },
      ],
      stateMutability: "view",
      sort: "perform",
    },
    {
      inputs: [
        {
          internalType: "address",
          name: "newOwner",
          type: "address",
        },
      ],
      title: "transferOwnership",
      outputs: [],
      stateMutability: "nonpayable",
      sort: "perform",
    },
    {
      inputs: [],
      title: "withdraw",
      outputs: [],
      stateMutability: "nonpayable",
      sort: "perform",
    },
  ],
};
Keep in mind to interchange the contract addresses with your individual in order that the Subsequent.js app tries to connect with the proper sensible contract.
Now let’s begin coding up our app. Open index.js file underneath pages folder and add the next:
import { useAddress, useContract, useMetamask } from "@thirdweb-dev/react";
import Head from "subsequent/head";
import Picture from "subsequent/picture";
import { oktoken, okvendor } from "../contracts";
import types from "../types/Residence.module.css";
import { useEffect, useState } from "react";
import Web3 from "web3";
const web3 = new Web3(Web3.givenProvider);
export default perform Residence() {
  const [tokensPerCurrency, setTokensPerCurrency] = useState(0);
  const [tokens, setTokens] = useState(0);
  const tackle = useAddress();
  const connectUsingMetamask = useMetamask();
  const account = web3.defaultAccount;
  const buy = async () => {
    const contract = new web3.eth.Contract(
      okvendor.abi,
      okvendor.contractAddress
    );
    const ethToSend = tokens / tokensPerCurrency;
    const buy = await contract.strategies.buyTokens().ship({
      from: tackle,
      worth: web3.utils.toWei(ethToSend.toString(), "ether"),
    });
    console.log(buy);
    await fetchPrice();
  };
  const promote = async () => {
    const vendorContract = new web3.eth.Contract(
      okvendor.abi,
      okvendor.contractAddress
    );
    const tokenContract = new web3.eth.Contract(
      oktoken.abi,
      oktoken.contractAddress
    );
    const approve = await tokenContract.strategies
      .approve(
        okvendor.contractAddress,
        web3.utils.toWei(tokens.toString(), "ether")
      )
      .ship({
        from: tackle,
      });
    const sellTokens = await vendorContract.strategies.sellTokens(tokens).ship({
      from: tackle,
    });
    await fetchPrice();
  };
  const fetchPrice = async () => {
    const contract = new web3.eth.Contract(
      okvendor.abi,
      okvendor.contractAddress
    );
    const priceFromContract = await contract.strategies
      .getNumberOfTokensInNativeCurrency()
      .name();
    setTokensPerCurrency(priceFromContract);
  };
  useEffect(() => {
    fetchPrice();
  }, []);
  return (
    <div>
      <Head>
        <title>Trade OKTokens</title>
      </Head>
      {tackle ? (
        <div>
          <p>Tokens per forex: {tokensPerCurrency}</p>
          <div>
            <enter
              sort="quantity"
              worth={tokens}
              onChange={(e) => setTokens(e.goal.worth)}
            />
          </div>
          <button onClick={buy}>Buy</button>
          <button onClick={promote}>Promote</button>
        </div>
      ) : (
        <div>
          <button onClick={connectUsingMetamask}>Join utilizing MetaMask</button>
        </div>
      )}
    </div>
  );
}
It is a lengthy code block, so let’s see what the code is doing step-by-step:
- Initializing the
web3bundle utilizing a supplier arrange by thirdweb - Utilizing thirdweb hooks
useMetamask()to authenticate anduseAddress()to test authentication state, then rendering the login button if the consumer doesn’t have pockets linked utilizing MetaMask - Setting numerous states to map textual content packing containers in our app
- Making a
fetchPrice()perform to work together with our sensible contract and test what number of tokens one MATIC can get, whereas additionally creating anuseEffectto test this worth each time the web page hundreds - Making a
buy()perform, which initializes our vendor contract and calls thebuyTokens()perform from the contract, then sending some MATIC together with this transaction. Then, we namefetchPrice()in order that the newest worth is proven
Lastly, we’re making a promote() perform, which initializes each token and vendor contract. First we work together with token contract’s approve() perform and permit the seller contract to switch funds on our behalf. We then are calling sellTokens() perform from the seller contract to lastly promote the tokens and obtain MATIC. We’re additionally calling fetchPrice() to get the newest worth after transaction.
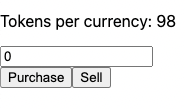
Our easy DeFi app is full! You’ll be able to view this app in your browser by working the next command:
yarn dev
Now when you go to http://localhost:3000, you must see the next display, and you must be capable to make transactions.
Conclusion
This was a easy tutorial on find out how to create your individual full-stack DeFi app based mostly on Polygon. You’ll be able to implement your individual logic on the sensible contracts to make it even higher relying in your group. I counsel tinkering round with the code so that you could study in one of the simplest ways attainable.
Be part of organizations like Bitso and Coinsquare who use LogRocket to proactively monitor their Web3 apps
Shopper-side points that impression customers’ skill to activate and transact in your apps can drastically have an effect on your backside line. For those who’re interested by monitoring UX points, routinely surfacing JavaScript errors, and monitoring gradual community requests and part load time, strive LogRocket.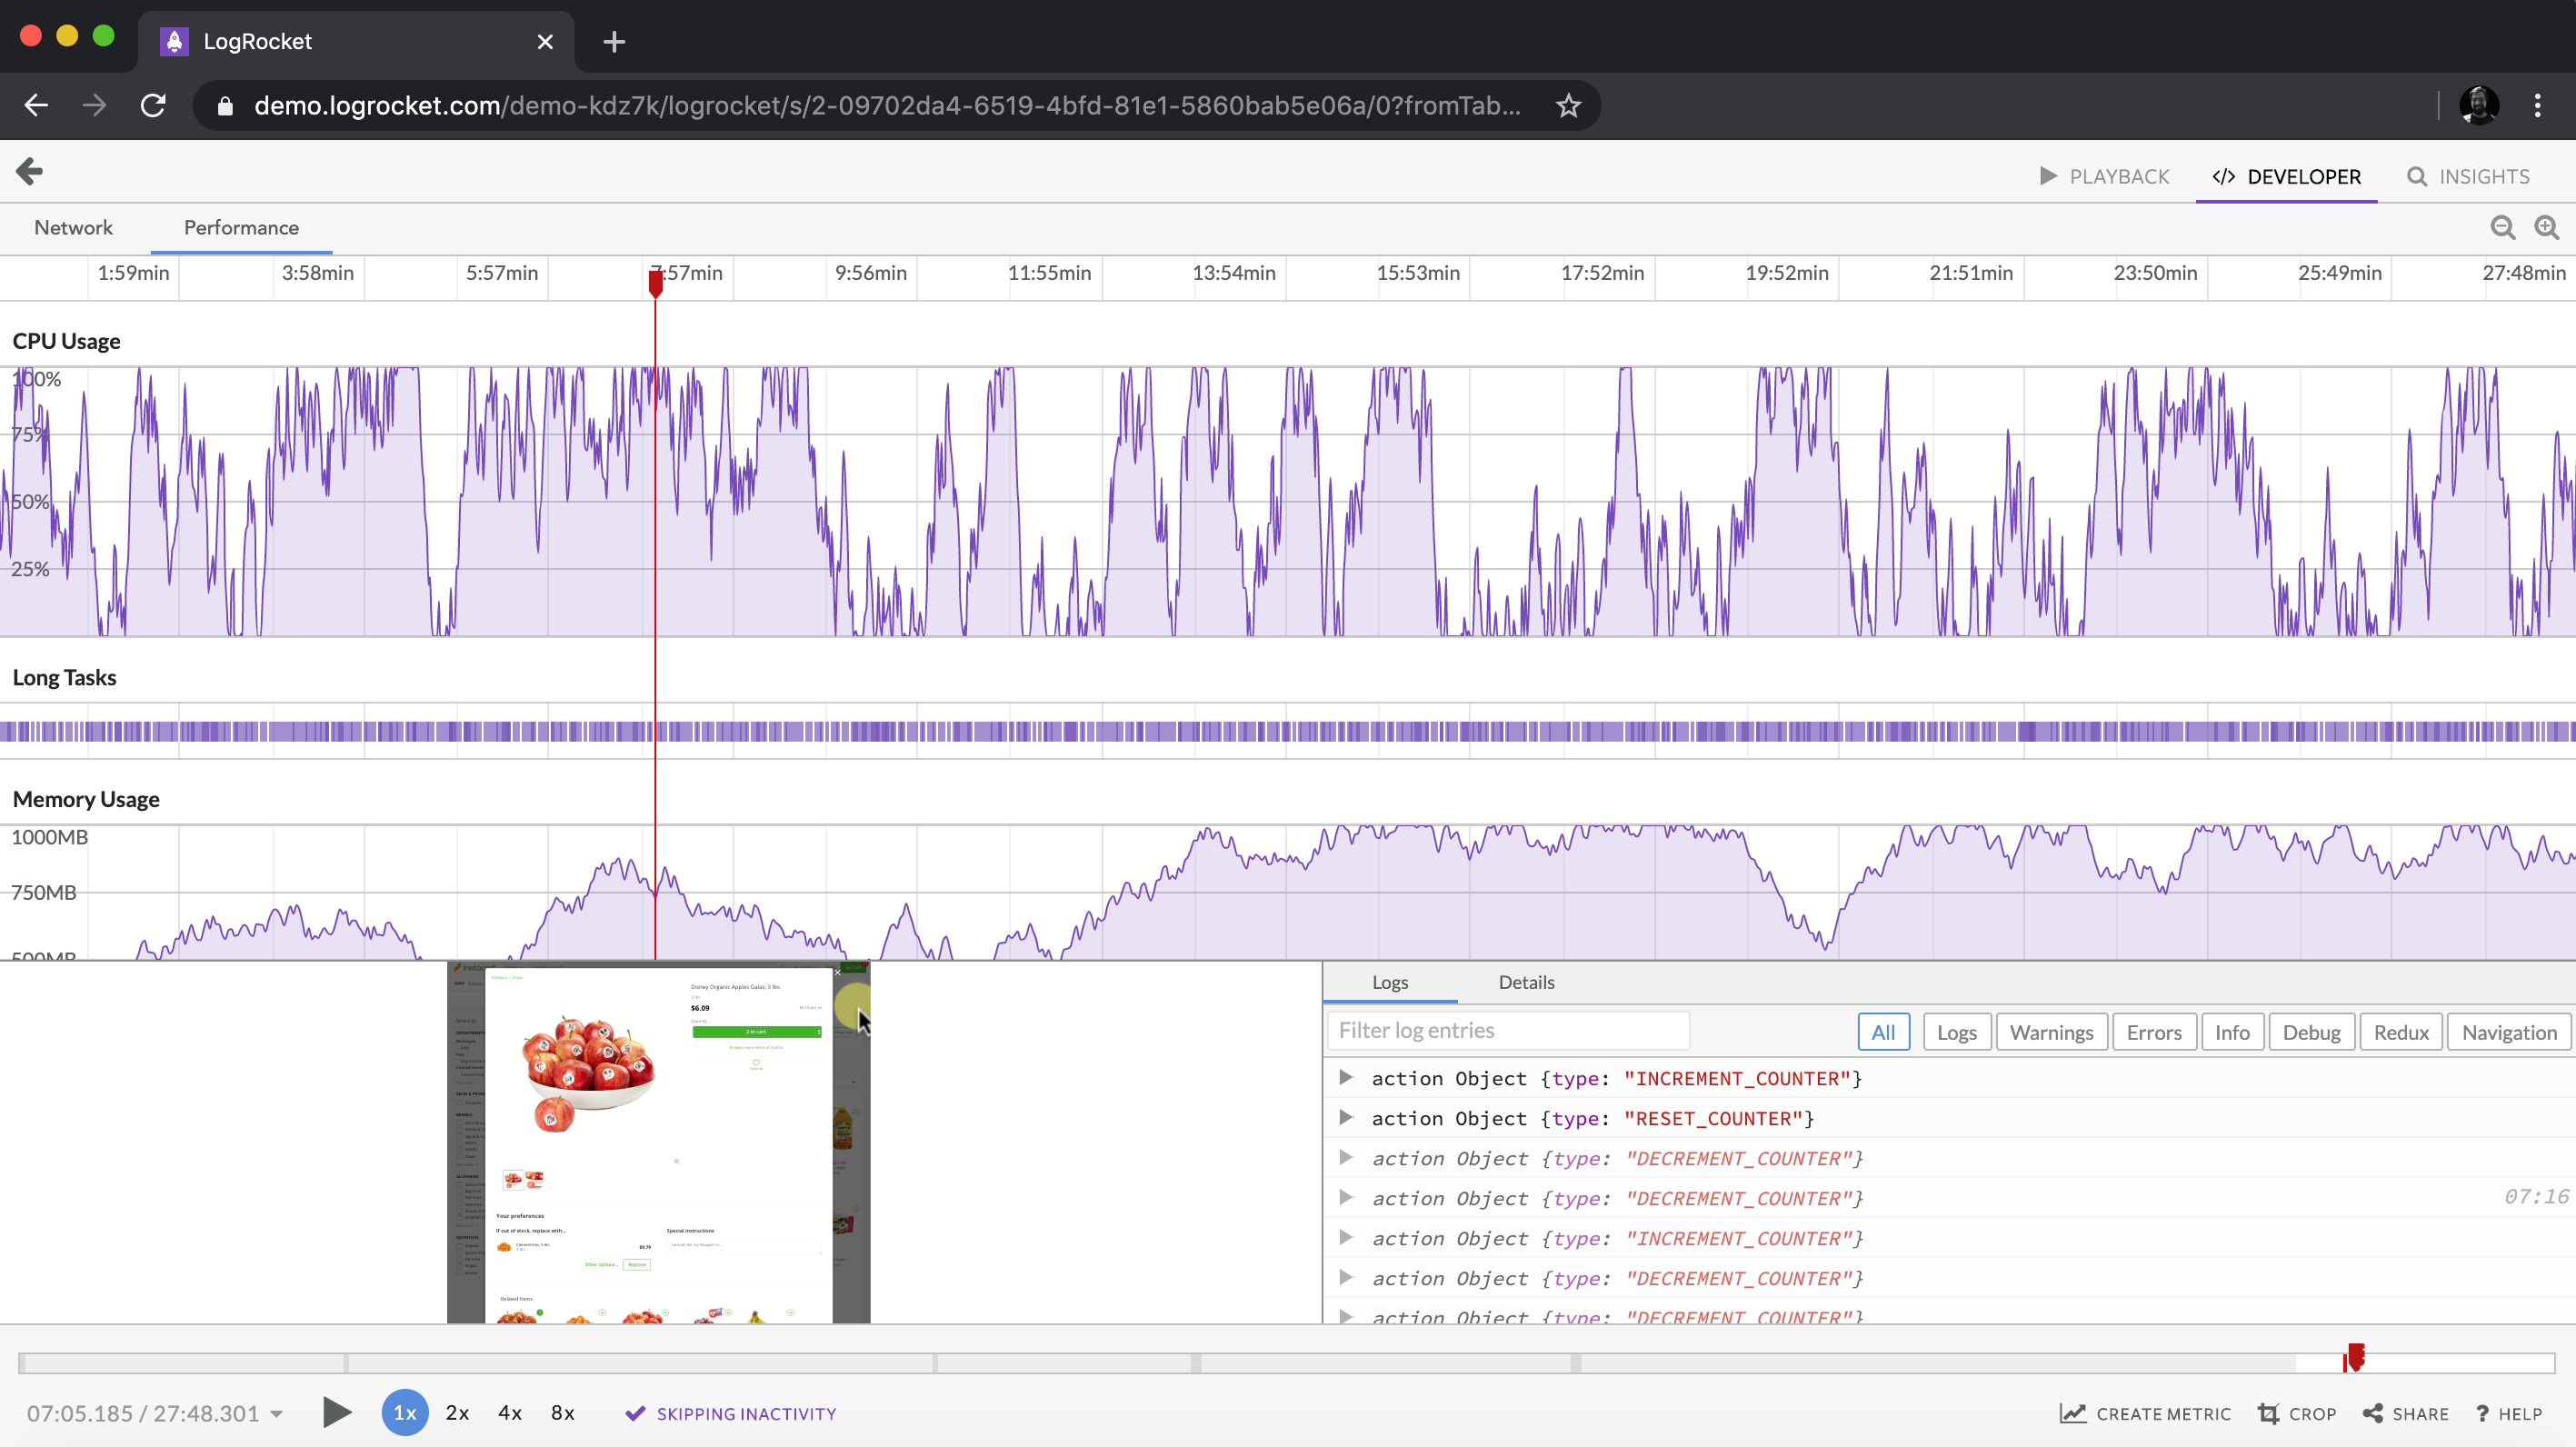 https://logrocket.com/signup/
LogRocket is sort of a DVR for net and cellular apps, recording every little thing that occurs in your net app or web site. As a substitute of guessing why issues occur, you may combination and report on key frontend efficiency metrics, replay consumer classes together with software state, log community requests, and routinely floor all errors.
Modernize the way you debug net and cellular apps — Begin monitoring at no cost.